恶魔奶爸新 ED
URL: http://dl.sparanoid.blog/data/
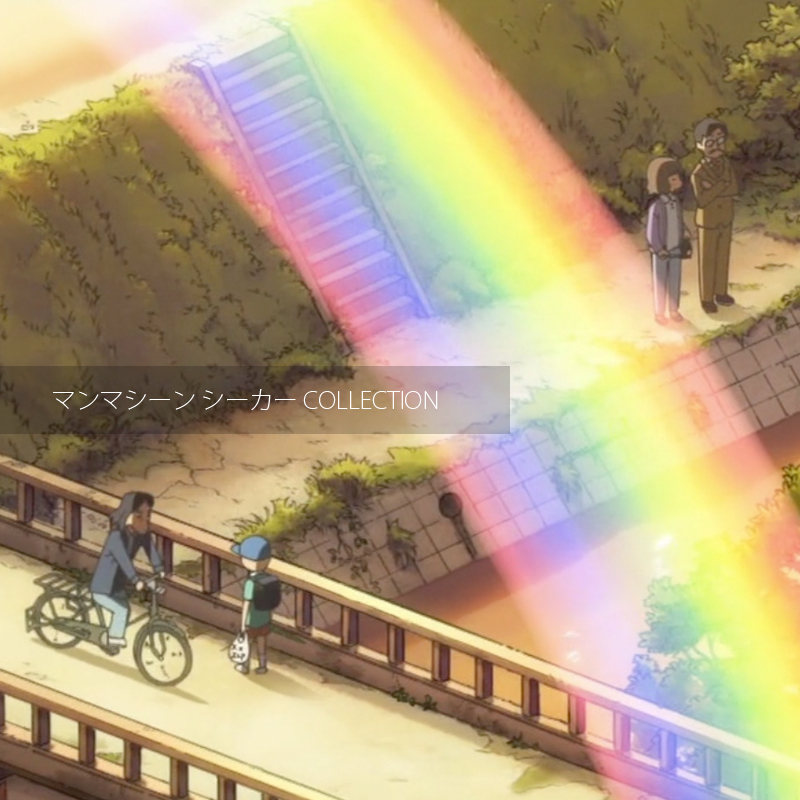
マンマシーン シーカー COLLECTION(マンマシーン シーカー コレクション)新开的坑,简称 MSC (Man-machine Seeker’s Collection) 以各种 OP 、 ED 、 INS 、 TS 的 TVRip 为主。这些音乐将会使用自制的封面。以 マンマシーン シーカー COLLECTION 标签为标记在本 blog 发布
先打开 Network Utility,切换到当前使用的 interface,一般是 en1,记下 IP Address
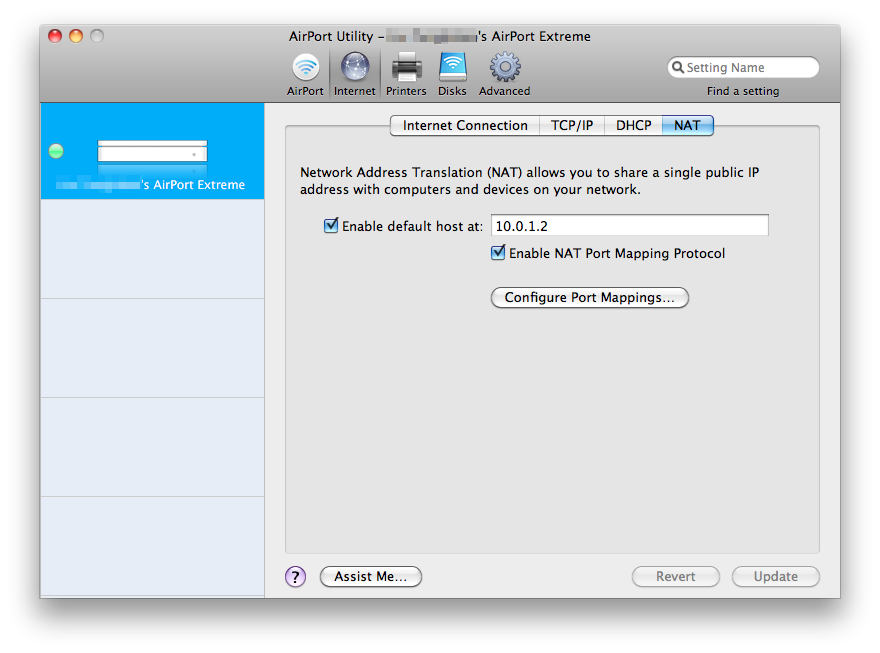
打开 AirPort Utility,切换到 Internet,选择 NAT 标签,勾选 Enable default host at 选项,里面填刚才的 IP 即可
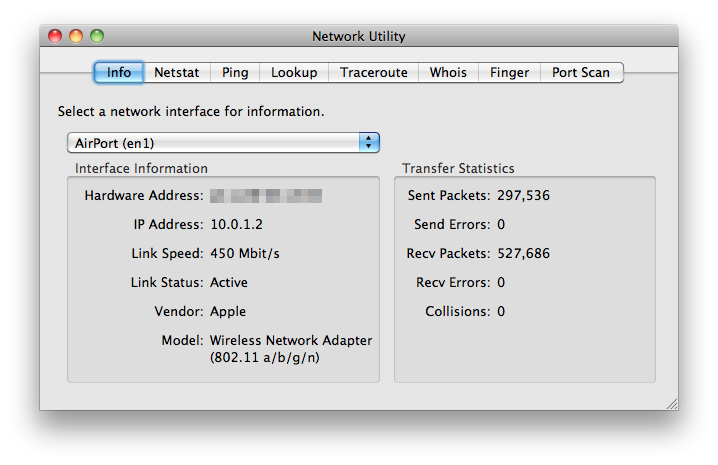
因为用的是 nginx,于是不需要配置 port mapping
另:如果你比较聪明的话,你会发现网上的攻壳无损音乐的全集就是我发的(我犯下的罪行),但是,唯独缺少的无损就是这张,所以⋯⋯如果你觉得你可以在网上找到这两张盘的无损的话,那么基本是不可能的(奸笑
存图
我说的没错吧,即使把 CSS 全盘端过来,内容变成中文的,界面就会变得奇丑

界面,功能都要强于 Alfred,制定性和 QS 也有一拼,现在 Macupdate 在打折,不过最近的更新进度不是很快,而且到现在也没上 Mac App Store,先用着再说
如果看了本文你也想试试 LaunchBar,往下看:
Single Seat License 的限制比较坑爹,具体是:
You may install and use (“RUN”) one copy of the SOFTWARE on a single computer. The primary user of the computer on which the SOFTWARE is installed may make a second copy for his or her exclusive use on a portable computer.
为避免两义性就不翻译了,根据自己的智力理解
http://groups.drupal.org/node/129624
真赞,什么时候 WordPress 能上 git 玩玩?
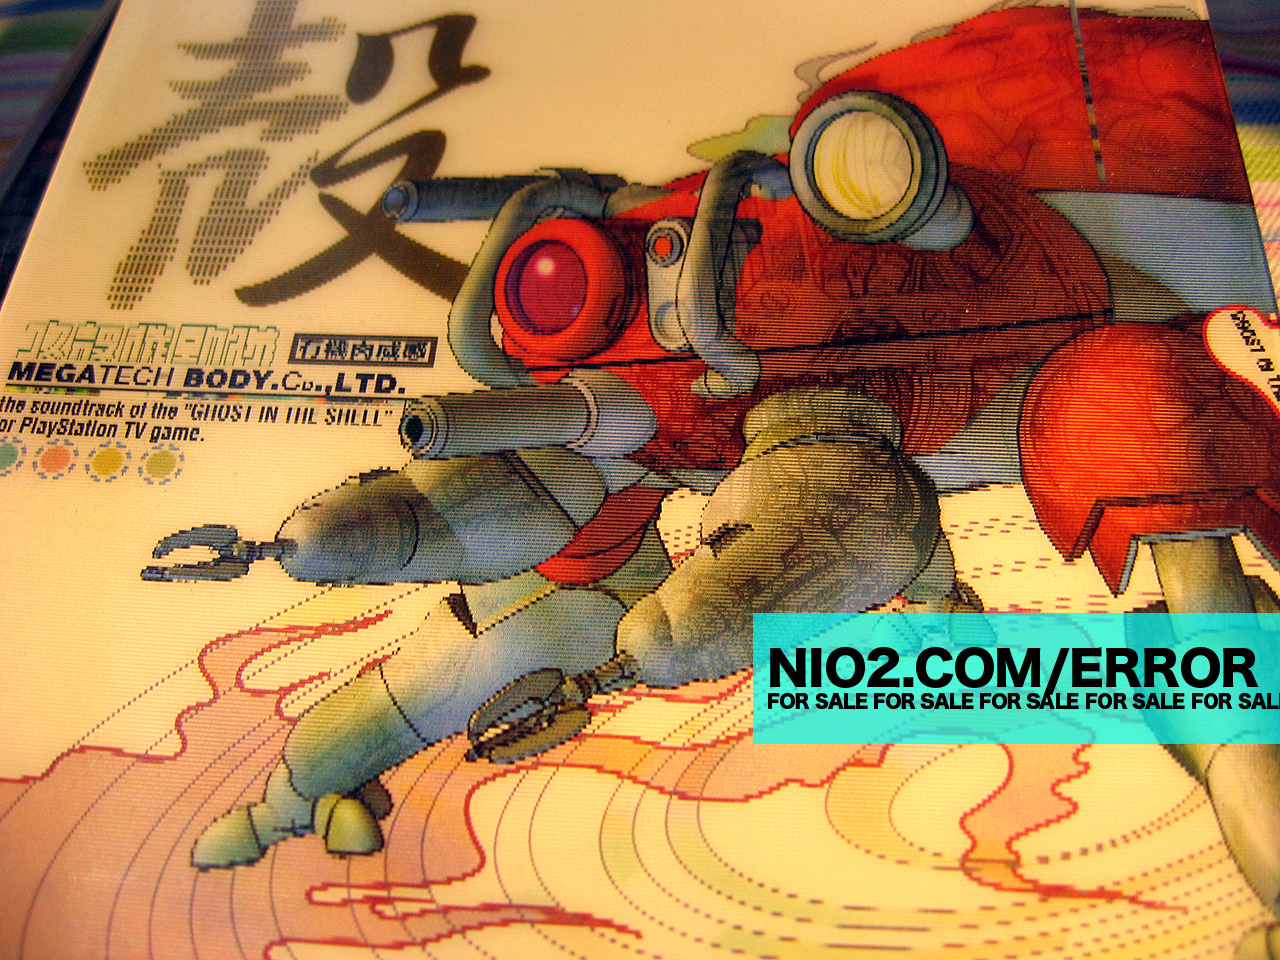
来自「STAR DRIVER<スタードライバー>輝きのタクト 2 特典 CD – オリジナルサウンドトラック1」
看了外星人官网还好点,看了地球人⋯⋯这就是个笑话啊
我有钱,就来个火星人,上四个 512 SSD,CPU 弄两块,显卡弄两块,18 寸的屏幕找 EZIO 做成 2560×1440 的,外观一定要做的好看,也可以做成防水防火防生化的那种,卖个 100 万,让买的人有买了车买了房一样的满足感,反正买这种货的人也不会用几次的
从此摄影器材的价格就降下来了,我就可以微笑着跳坑了
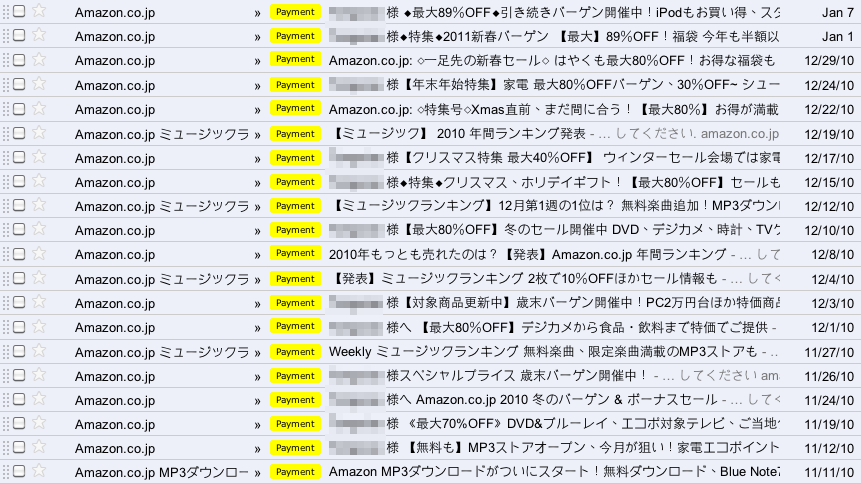
在他们眼里,email 周刊就是日刊
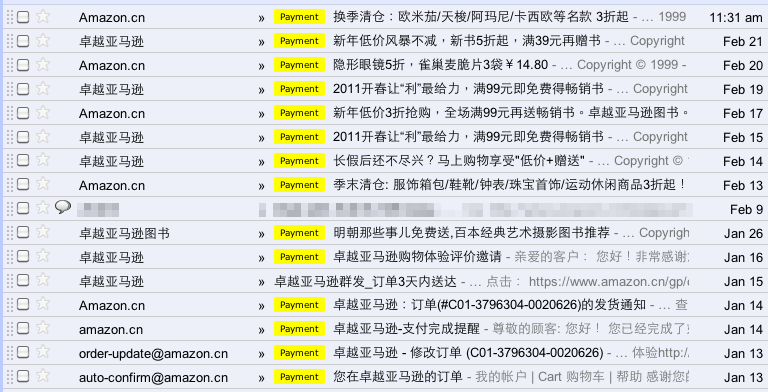
日本也不咋地,不过起码隔几天一发
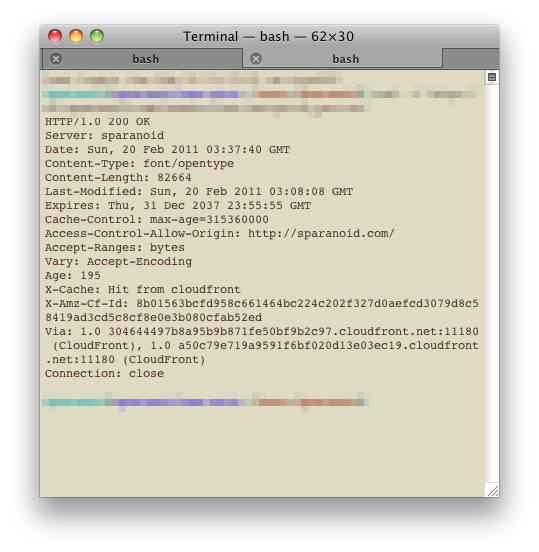
CloudFront 在去年年末的时候开始支持 custom origin 模式,也就是 origin pull 模式,说简单些,就是说来源文件不是放在 Amazon S3 上,而是放在自己的服务器上,然后 CloudFront 去 pull 那些文件,从 AWS 的 blog 上看到,好像目前只有配合客户端才能够设置 custom origin
这到底有什么用呢?众所周知放在 Amazon S3 上的文件虽然支持自定义 header,但依然有限制,例如 Firefox 跨域访问字体文件,就必须设置正确的 Access-Control-Allow-Origin 才可以。如果你尝试过的话会发现强行加上的自定义 header 会变成 x-amz-meta-access-control-allow-origin,那么 custom origin 就会很好的解决这个问题,自定义 header 都会得到保留
简述实现步骤:
从最早的 Delicious 到 Google Bookmarks,又到 Chrome 的本地书签,最后还是换到了 Pinboard,同时还试用了 Mr. Wong 、 Zootool 、 Historio.us,觉得 Pinboard 有以下优点:
不是很好用
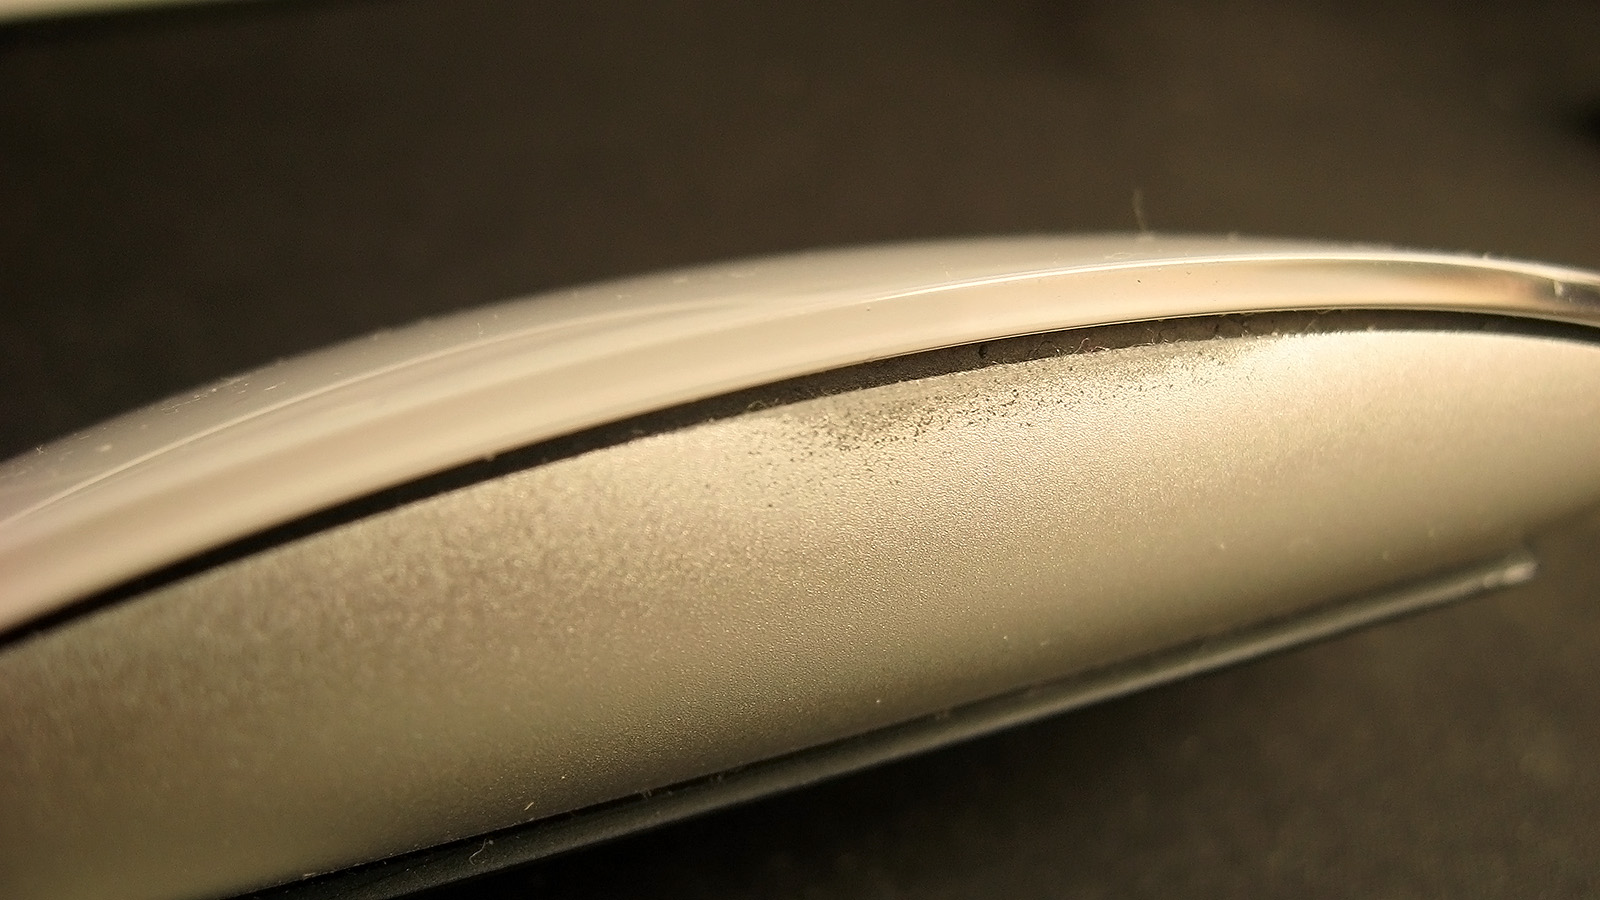
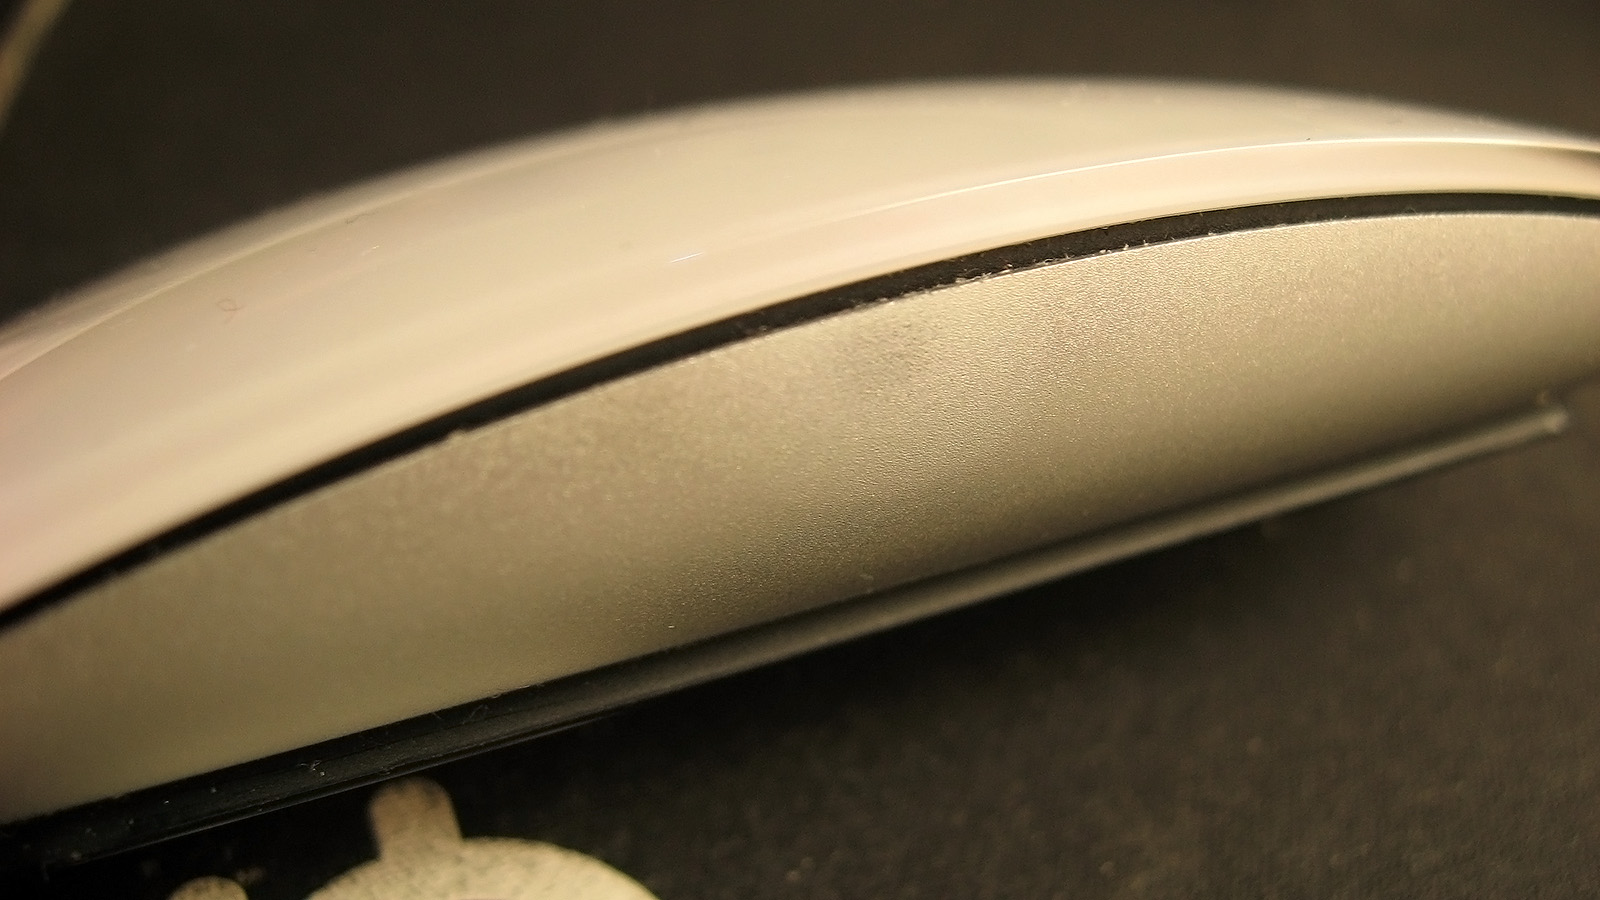
看了下购买日期,一个月整,拇指位置的漆已经掉了,真是差劲啊,你看我的罗技君折腾一年多都没事
新版可以考虑用铝的嘛,然后学罗技卖他 $99
在日文官方的 WordPress 包中,发现了这么个好物:wp-multibyte-patch 。看名字也大体知道是干嘛的了,由日本人写的,粗略看了下,感觉是最全面和好用的针对非英文用户的补丁了,不需要任何设置,装上就可以用(不过也有参数可调),支持 WordPress multisite(丢到 mu-plugins 目录),作者比较低调,插件官网在 这里
主要修正经典的摘要长度问题,效果参见本 blog 摘要,还有不少是针对日文的,比如同样搜索全角空格,修改 email 编码为 JIS 等,目前本人仍在间断的练习五十音中,日文好的自己去作者官网看吧
我们在安装的时候,把 /ext/ja/config.php 下 $wpmp_conf['mail_mode'] = 'JIS'; 的 JIS 改成 UTF-8 就行了
更新:WordPress 3.2 后已经不存在此文件了。直接安装后激活即可,使用,想修改默认设置需要拷贝配置文件到 wp-content 目录下,具体可参考官方网站说明
rm -rf /Library/Internet\ Plug-Ins/aliedit.webplugin
rm -rf ~/Library/Internet\ Plug-Ins/aliedit.webplugin
YUI Compressor 在处理 CSS 的时候无法正确处理 media query:
@media screen and (max-device-width: 480px)
压缩后会变成:
@media screen and(max-device-width:480px)
解决方法是从官方的 GitHub repo 中直接编译,或者直接下我编译好的:
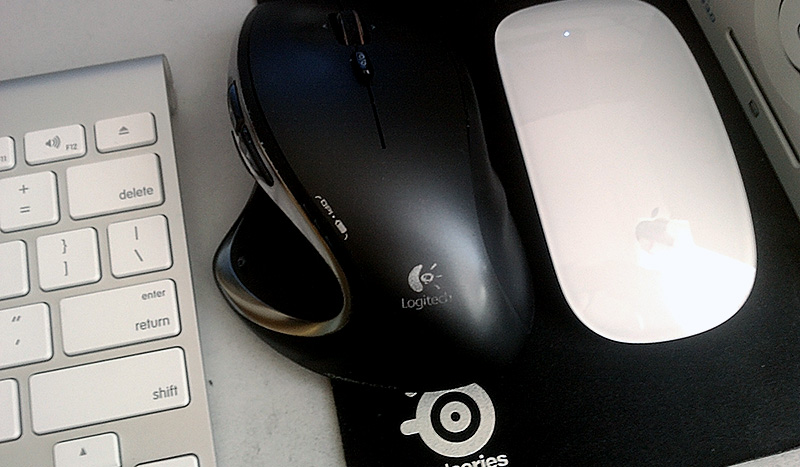
Logitech Performance MX(以下简称 M950)完胜 Magic Mouse(以下简称 MM),一个带接收器,激光鼠,一个无接收器,蓝牙鼠,MM 在电量低于 10% 的时候甚至都会丢失信号
(more…)
缺一不可,比较坑爹,试完了才发现 quirksmode 提到过
width: 200px;
white-space: nowrap;
overflow: hidden;
text-overflow: ellipsis;
全新版本,Firefox 下依然可用:
overflow: hidden;
display: -webkit-box;
-webkit-box-orient: vertical;
-webkit-line-clamp: 1;# 这是 OS X 只要用 Finder 访问就会生成的玩意,先执行一遍,然后再配合 TotalFinder 的 .DS_Store 收集功能,文件夹中就再也不会出现这种文件了
sudo find / -name ".DS_Store" -depth -exec rm {} ;
# 从 Windows 下转移过来的文件的残留物
sudo find / -name "desktop.ini" -depth -exec rm {} ;

sudo find / -name "Thumb.db" -depth -exec rm {} ;
# 由 Samba 和一些虚拟机产生,如果不知道是什么就忽略此条
sudo find /Users/username/Dropbox/ -name "*Zone.Identifier*" -depth -exec rm {} ;

来自:sound sepher – Cradle2,x82.6099 倍速加速版
(more…)
目前網上各種不靠譜的自動化安裝腳本不計其數。 nginx + PHP-FPM 教程也不多,本篇備忘錄重點針對 PHP-FPM 安裝,參考 nginx 官方 docs 與 Slicehost wiki 編寫而成
一破 IM 居然是 mpkg 包,mpkg 包吧竟然没 Uninstaller,卸载方法吧竟然我在 Mesenger 开发者 PDF 里才能找到,而且还不全。这是我用 Mac OS X 这两个月来见过最傻逼的 Mac OS X 程序,另外值得一提的是。 Skype for Mac 和此软件有一拼
#!/bin/bash

rm /Applications/Microsoft Messenger.app
rm ~/Library/Preferences/com.microsoft.autoupdate2.plist
rm ~/Library/Preferences/com.microsoft.error_reporting.plist
rm ~/Library/Preferences/com.microsoft.Messenger.plist
rm -rf /Library/Application Support/Microsoft
rm -rf ~/Library/Preferences/Microsoft
rm -rf ~/Library/Caches/com.microsoft.Messenger
rm -rf ~/Documents/Microsoft\ User\ Data
回家之后发现 Rackspace 在网通的表现一般,另一杂牌 VPS 的 SSH 速度也不能满足我用于翻墙,这时发现 RAM Host 的 Atlanta 机房 测试的速度很给力,虽然不在西岸,但 [禁忌事项] 已经阻止不了我了,于是买了一个季度用来撑过这个假期
买来之后发现登录方法与其他 VPS 不同:先要用 ssh vz@HOST_MACHINE_IP 登录他们的总 Host Machine,用户名密码都是 vz,然后再输入你的 RAMCP (RAM Control Panel) Username,才能登录到自己的机器,登录后执行下列命令修改 root 密码:
passwd
RAM Host 的默认配置精简到 SSH 相关组件都没有装,于是要执行下列命令:
apt-get install ssh
由于我只用 RAM Host 的 SSH 来翻墙,不需要 web 服务,可免去 apt-get update 。然后就可以直接用 VPS IP Address(而不是 Host Machine)地址登录了

这是人工延长的版本,时长 3 分 43 秒
(more…)
现在很多人都在做云输入法,然而对于云输入法,给我的感觉,也仅仅是在手头没有其他可用的输入法的情况下我才会去考虑,那么很显然,我们需要的是日文云输入法,韩文云输入法,火星文云输入法,脑残文云输入法,甚至英文云输入法,而不是中文云输入法。这些外文的输入法应用在一些特定的网站,还是会有不错的使用率的
最简单的例子例如,JSharer,VeryCD 等分享社区的搜索部分,就可以集成日文云输入法来方便搜索日系资源。对于安装外文输入法有困难的用户,或者说想去了解一门语言的用户来说是再好不过的了
现在 Last.fm for Android 升级到了 1.6.5,具体的更新历史看 这里,从 1.6 版本开始,Last.fm 加大了对非 US 、 UK 和德国的限制,即使你从 这里 下载到了 apk 并成功安装,付费用户也无法继续听 radio 了。换句话说现在此应用已无区域限制,任何国家都可以从 Market 上下载到,但程序内做了手脚,非 US 、 UK 、德国的付费用户一样不能听 radio,所以,就有了现在的这个 patch 版本
现在用电脑打开 此页面,用手机读取其 QR 码即可下载破解了国家限制的(补丁)版本,然后先删掉原版,再安装(否则提示安装失败)
如果不放心破解版,怀疑其安全性的话,可以使用之前没有限制的 1.5.6 版,地址在 这里

[990428]トール・スネーク・ EP「serial experiments lain OP 収録」/bôa (WavPack Lossless+BK)
玲音 OP,动画也比较值得看。赛博朋克类作品。第三首 デューベイ (アコースティック・ヴァージョン) 试听:
(more…)
青い文学的 ED 的 BDRip 版,很早就想在這裡發了,順便繼續測試 flash 播放器
(more…)
這是第一次這麼嘗試,沒那麼多時間一張張專輯掃著聽,隨便聽點發上來,希望能堅持下去。歌是用來聽的,所以就不介紹了
(more…)
以前经常要用开启整个硬盘的共享在 LAN 里实现 2 ways sync,但现在不需要了,可是在权限的设置上却出了点问题,有时候甚至会遇到部分文件夹完全无法访问的情况,虽然手动修改可以扩大权限而继续访问,但如此多的文件同时处理实在是很大的工作量
于是网上搜到了 Xcacls.exe 这个权限工具,于是就有了下面的命令:
d:>icacls * /reset /T /C /Q

e:>icacls * /reset /T /C /Q

f:>icacls * /reset /T /C /Q

g:>icacls * /reset /T /C /Q

h:>icacls * /reset /T /C /Q

i:>icacls * /reset /T /C /Q

j:>icacls * /reset /T /C /Q
需要注意的是,如果文件非常多,例如大于一万个,就会需要一段时间(几分钟至十几分钟)。另外,特定的系统文件夹,例如 $RECYCLE.BIN 与 System Volume Information 的权限也会被覆盖,而不是真正的 “reset to default” 所以使用时需谨慎。最后,在一切都执行完成后,第一次查看分区属性时,有可能会遇到类似 “回收站文件损坏,是否清空回收站” 之类的提示,选择是即可,这是由于权限更改而造成的,以后不会再出现
如果你对统一化后的权限的安全问题担忧,而又不想重装系统来恢复一些系统默认的文件权限,可以考虑 微软给出的重置建议
換郵箱是非常麻煩的一件事情,許多與之綁定的帳號都需要修改,都改的話非常的繁瑣,無疑是一項體力活
目前就 Google Apps 的應用來說,與 Google 的服務集成的還不夠完整,當然,有人會說,Google Apps 本身就是面向企業的,企業一般也就用 Gmail 、 Docs 、 Calendar 這三個服務,也的確,而且在 Google Apps 中我也的確只用這三個,(Contacts 算是從 Gmail 中分離出來的小服務)。可惜的是,其他有趣的服務還是無法集成到 Apps 中,例如 Google Reader
作為 Google 上癮者,還是打算把郵箱改回到 Google 的普通帳號,以下是一些備忘
從 Google 的聯繫人說起,Android 用戶一般都會將 Contacts 與 Google 的 Contacts 集成,這裡需要注意!不要因為有導入導出功能,就直接將要導入的郵箱的舊聯繫人刪除,這樣的直接結果就是你的 Google Profile 中的 follow 人數清空。並且 Google Reader 中你不再會 follow 任何人!所以,記得將就聯繫人先轉移到其他的分類,然後再導入新聯繫人,如果你沒有 follow 過幾個人並且認為舊聯繫人實在沒必要,可以直接刪除然後導入導出
再說下郵件過濾規則,首先要把郵件 Filter 規則同步到新郵箱。在兩個郵箱的 Labs 中同時開啟 Filter import/export 即可。很方便
然後郵件,郵件的話當然是希望全部轉移到新郵箱,這樣的話可以選擇使用 POP 來收,在新郵箱的設置中根據提示設置即可,Gmail 的服務器為 pop.gmail.com,端口 995,需要開 SSL,詳細參考 這裡,開啟後 Gmail 會自動定時抓取郵件,當然自動抓取速度會有些慢(間隔時間比較長),如果舊郵箱郵件比較多的話可能要花上 3 、 4 天才能全部抓取過來,這時建議在 Labs 中開啟一個叫 Refresh POP accounts 的擴展來加快刷新速度。導入後會自動應用上之前的 labels,不必要重新創建,不過 labels 不會有自定義顏色,目前好像沒導入的方法,手動改一下就可以了,也不會很麻煩
Calendar,舊的日曆直接分享訂閱即可,一些公共的訂閱也可以直接訂到,但有時一些比較 out of date 的日曆不會出現在訂閱列表中,這是進入舊賬戶將日曆通過 email 的方式分享出去就可以訂閱了
關於 Gmail 和 Calendar 中的 Tasks,可以直接一次性複製,先在舊列表中選擇 email 列表,全選複製然後直接在新列表中粘貼即可,Tasks 會自動根據換行符為內容進行換行
最後說下 Docs,因為是 Google Apps 轉到 Google 普通帳號,所以之前的舊文檔不可以通過轉移 owner 來實現文件轉移。而且,目前 Docs 的批量打包下載存在問題,所有非英文字符的文件名都會變成一長串橫線,如果檔案量很大的話,這也的確是一鍵痛苦的事,所以唯一省時省力的方法就是用 Share 功能分享出去,這樣在新帳號那邊同樣會出現文章的列表,並且可以設置是否可以編輯他們,只不過 owner 並不屬於新帳號
都轉移完畢後,就是一些善後工作了,例如,要在舊賬戶中將所有到達此郵箱中的郵件自動轉發到新郵箱,停止在新郵箱中接 POP,轉移 GTalk 好友,聯繫人也需要仔細的看一下
另外需要說明,Android 系統的移動終端如果需要更改郵箱,是一定要恢復原廠才可以進行的
网上类似的教程已经不少了,例如:
live.jp 注册页面;live.hk 、 hotmail.com.hk 注册页面,包括 这里 的老版本修改区域代码的 MSN Hotmail 注册页面
于是,根据这个可以该出很多,这里补充了几个不常见的,打开 这个 页面后,在地址栏中输入下列代码并回车:
javascript:function r(q){} function s(q){e[q] = new Option(a[q],a[q])}; r(e = document.getElementById("idomain").options);r(d="live.");r(a = new Array("hotmail.com","hotmail.co.uk","hotmail.co.jp","hotmail.com.hk","hotmail.com.cn","msn.com",d+"com",d+"hk",d+"dk",d+"cn",d+"se",d+"be",d+"co.uk",d+"de",d+"fr",d+"it",d+"nl",d+"jp",d+"co.kr")); for (i=0;i<a.length;i++){ s(i ) }alert("Success!");
最后附个神奈川県 横浜市中区的邮编:231-0801 、 231-0813
已测试:
Windows Live Mail(Hotmail)账号及企业版(自定义域名)账号转发至 Gmail 或 Google Apps(自定义域名)账号,其他邮件提供尚未测试,不过应该都可以的
方法是:
将要转入的邮箱 注册为 Windows Live 账号 即可
注意事项:
开启转发后会在后台中显示:Please sign in at least once every 270 days so that your account doesn’t get deleted. (In order to help fight junk, we delete inactive accounts.),也就是说,你必须在 270 天内登陆一次这个邮箱,否则删账号
东拼西凑,备忘属性很多,总之 CentOS 上跑 rtorrent 做 seedbox 大体需要以下这些:
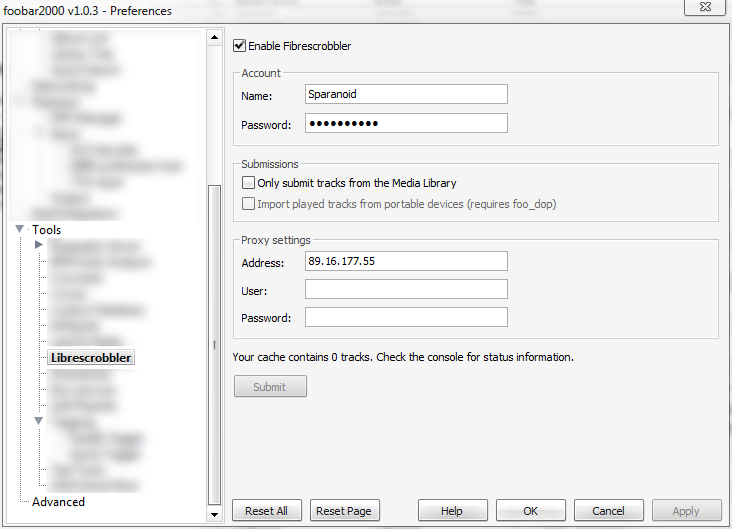
libre.fm 是一个开源的类 last.fm 服务,当然会有免费 radio,并且都是 indie artists,这个 foo_librescrobbler.dll 是根据 foo_audioscrobbler.dll 不合法修改字串而来,没技术含量,而且设置界面存在 bug(功能上完全稳定)。这个 bug 是有时打开 fb2k 选项时不会显示 Librescrobbler 选下,关闭后继续 ctrl+p 直到出现为止-_
可以与 foo_audioscrobbler.dll 同时存在于 fb2k,使用时如下图设置即可(89.16.177.55 为 turtle.libre.fm/ 的地址):
最后更新:2010-08-03T14:41:54+08:00
提示:本文為攻殼機動隊音樂合集 DL 的流放信息更新文。如果你想找的是攻殼機動隊所有音樂的詳細信息及曲目列表,請訪問 攻殼機動隊 Ghost in the Shell 音樂列表
√ Ghost_in_the_Shell_(720p_Bluray_DTS)
√ Ghost_in_the_Shell_(1080p_Bluray_DTS)
√ Ghost_in_the_Shell_2.0_(1080p_Bluray_DTS)
√ Ghost_in_the_Shell_2.0_(1080p_Bluray_FLAC)
√ Ghost_in_the_Shell_2_-_Innocence_(720p_Bluray_DTS)
√ Ghost_in_the_Shell_2_-_Innocence_[Absolute_Edition]_(1080p_Bluray_FLAC)
Ghost_in_the_Shell_S.A.C._2nd_GIG_Individual_Eleven_(1080p_BluRay_DTS)
Ghost_in_the_Shell_S.A.C._Solid_State_Society_(1080p_Bluray_DTS)
√ Ghost_in_the_Shell_S.A.C._The_Laughing_Man_(1080p_Bluray_AC3)
Ghost_in_the_Shell_(720p_Bluray_DTS)
Ghost_in_the_Shell_(1080p_Bluray_DTS)
Ghost_in_the_Shell_2.0_(1080p_Bluray_DTS)
Ghost_in_the_Shell_2.0_(1080p_Bluray_FLAC)
Ghost_in_the_Shell_2_-_Innocence_(720p_Bluray_DTS)
Ghost_in_the_Shell_2_-_Innocence_[Absolute_Edition]_(1080p_Bluray_FLAC)
Ghost_in_the_Shell_S.A.C._2nd_GIG_Individual_Eleven_(1080p_BluRay_DTS)
Ghost_in_the_Shell_S.A.C._Solid_State_Society_(1080p_Bluray_DTS)
Ghost_in_the_Shell_S.A.C._The_Laughing_Man_(1080p_Bluray_AC3)